Tuesday 11 August 2015

Format USB and Remove All Errors in One Go Using Command Prompt

How To Format USB using Command Prompt ( Clean MBR )

  • Facing slow transfer speeds? 
  • Unable to make USB boot-able for installing windows?
  • Facing errors which seems like is virus but it's not?

Today our main focus is on how to format USB properly.
There are number of Factors on which performance of USB pen-drive depends Read Our article on " Link of Speeding up USB "

OK! you must ask: Why Format through Command Prompt?
You should kept this in mind that still some stains of corrupt data remains in the USB after formatting it through windows defined procedure.

Lets get Started!
Follow steps below an show your friends how smart you are:

1- Go to > Search > for Command prompt.

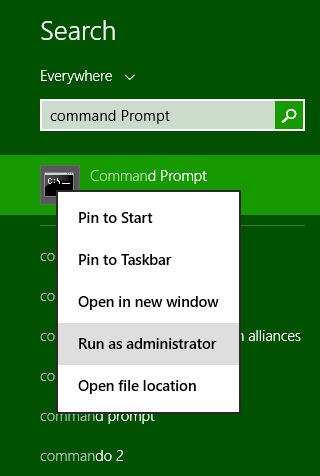
2- Open Command prompt as Administrator > and type diskpart

3- type list disk  >Press enter after every time you type

4- type select disk and number of your USB disk( like select disk 1)
   NOTE !  be careful in selecting disk don't select your hard drive accidentally to avoid this see size of your selected disk.

5- type clean

6- type create partition primary

7- type Select partition 1

8- type active

9- type format quick fs=fat32

10- type assign

11- type exit to exit the diskpart utility

12- type exit to close command prompt

Done! Now If you check properties of your USB there will be 0 bytes used Space and MBR of USB is cleaned as well.

 Now you can easily make your USB Bootable with no problems. 


How to Enable Hibernate Option in Windows 8

How To Enable Hibernate Option in Windows 8 / 8.1

Feeling Annoyed by that missing HIBERNATE option in Windows 8 ? well i hope you will feel relaxed after reading today's article. We will move from Left to right in this post as Shown in Screen Shot below.


You might have realized a lot of changes after upgrading from windows 7 to windows 8 or 8.1, which includes so many interface/appearance changes features.
To get Fast Boot up in windows 8 Microsoft disabled a lot of programs and features at default, But the Good News is you can enable them putting in some effort. and in procedure below you will not even feel that you are doing any undesired effort. So Lets get started with the procedure:

1- Go to the Control Panel > Hardware and Sound

2- Now click > Power options in there choose > Change what the power buttons do

3- Now follow instructions given in screen shot below, check the box for HIBERNATE Option and save changes. Boom! you did it!
Don't forget to Share or comment.


How To regain 7 GB disk space after upgrading to windows 10

If you are wondering how come we will free that huge space? well the answer is simple we will delete previous windows installations on your pc which are useless after upgrading to windows 10 in the process below.

As you have upgraded to windows 10 you definitely want to try new apps and games,You also know you can't stop win updates in windows 10. If you don't think so your hard drive has enough space for that new gear and windows updates this guide will help you make some room for installing all that stuff you are eager to try by freeing up more than 7 GB space.

Lets Get Started:

1- Start typing Disk Cleanup " in windows search
    open it and select the drive on which you have your OS installed.


2-  Select Drive for me that is Drive C: which has windows installed on it.


3- Click on "Clean System files " Select the drive again if it asks you to:


4- You see now you can free upto 7 GB space by clicking ok and delete those previous windows installations:


If you feel this was helpful Share this with your friends. and feel free to comment if you have any confusion have a nice day.